Step 8 – Time for some electrical work
I traced back the printed circuit inside my organ donor keyboard. I wanted this machine to be convertible in the future when my son is to old for baby software (also I might need to play some games on it, for testing purposes of course). The left keys will be mapped to the arrow buttons and the right keys will be mapped to the standard MAME keys.
Out of 16 possible connections on the keyboard matrix 2 of them were shared between buttons so that leaves me with 14 pins to solder.
I don’t have much soldering experience so 14 connections took me quite a while. I got it done though.
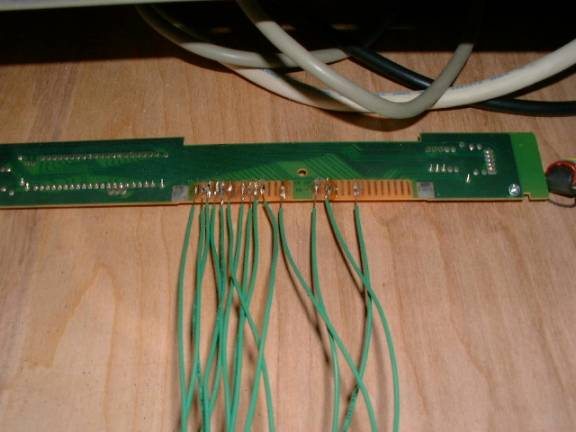
This picture is a bit blurry but that is ok because if it were any better you could see how ugly my solder job is.
Here it is inside it’s new home. I crimped connecters on the ends of the wires to save myself from having to solder them onto the buttons.
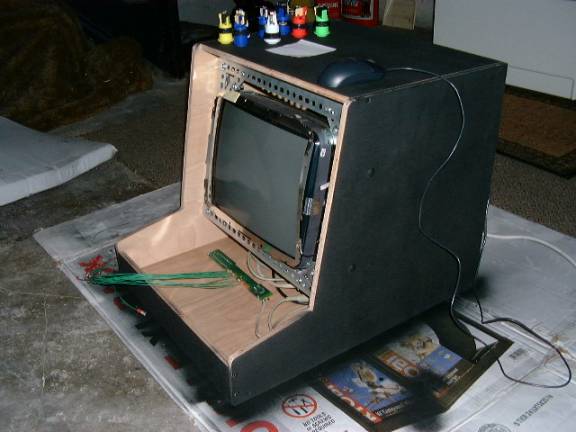
You can see on top of the unit that my video game buttons came in the mail. Jolly candy like buttons. Mmmmm
I also have applied the first coat of paint. Black is the base for the artwork that my wife will be doing later on.
A flick of the wrist and the rest of my components were inside.
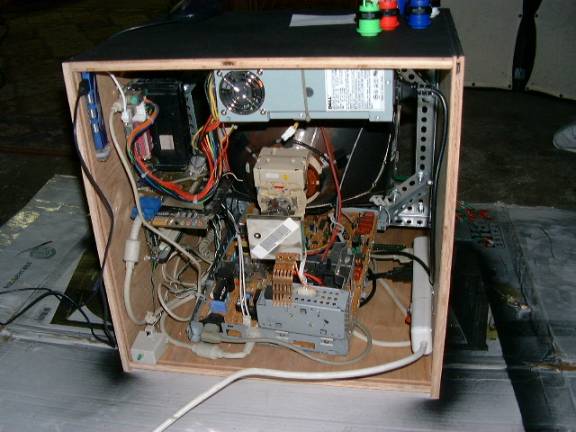
I put a USB hub in the upper left corner. Now I can connect a mouse, keyboard, and memory key to make this a fully functional computer any time I want to. So there.